
Published February 11, 2026
Create a Keychain with Old Photos - DIY
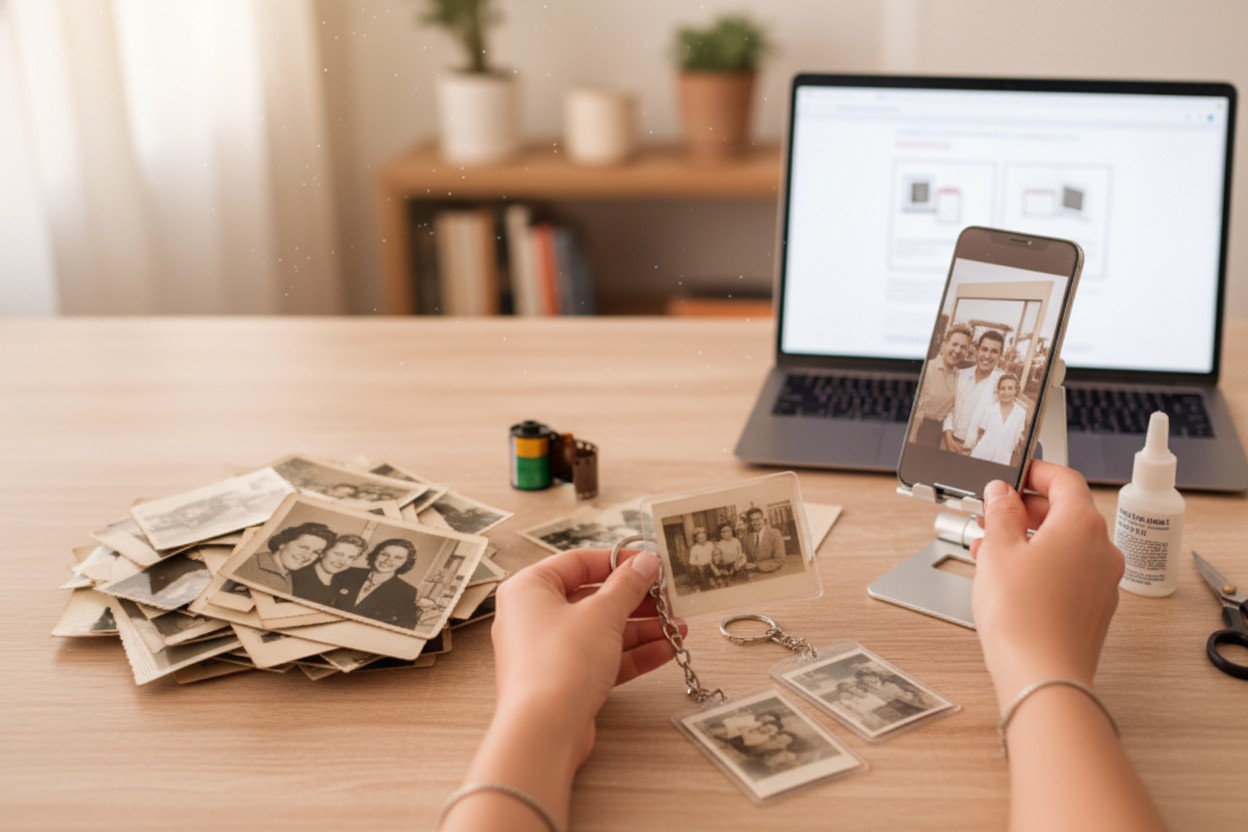
Do you have a box of old photos gathering dust? Maybe they’re tucked away in albums, or perhaps scattered loosely in a drawer. Those precious memories deserve to be seen and enjoyed, not just stored away! One fantastic way to bring those cherished images into your everyday life is by creating a personalized photo keychain. It's a simple, fun, and sentimental DIY project that allows you to carry your favorite memories with you wherever you go. This guide will walk you through the process, step-by-step, so you can create your own custom photo keychain.
What You'll Need
Before you get started, gather your supplies. Here's a list of everything you'll need:
- Old Photos: Choose your favorite photos! Consider the size and shape of your keychain to determine the best fit.
- Keychain Blanks: You can find these at most craft stores, online retailers (like Amazon or Etsy), or even at some dollar stores. They come in various shapes and sizes (round, square, heart-shaped, etc.) and are usually made of acrylic or metal. Choose a style you like!
- Scissors or a Paper Cutter: For trimming your photos to the correct size.
- Pencil or Pen: For marking the photo size.
- Ruler: To measure your photos accurately.
- Clear Adhesive: This is crucial for sealing your photos. You can use:
- Mod Podge: A popular craft adhesive and sealant.
- Epoxy Resin: Provides a durable, glossy finish (requires careful handling and curing time).
- Clear Glue: (e.g., Elmer's) works, but may not be as durable.
- Paintbrush or Applicator: For applying the adhesive.
- Optional:
- Hole Punch: If your keychain blank doesn't have a hole for the keyring.
- Glitter, Decorative Paper, or Embellishments: To add extra flair to your keychain.
- Tweezers: For precise placement of small embellishments.
Step-by-Step Guide to Creating Your Photo Keychain
Now, let's get crafting! Follow these steps to create your personalized photo keychain:
- Choose Your Photos: Select the photos you want to use. Consider the size and shape of your keychain blank. If you're using a square keychain, square photos will fit perfectly. If your keychain is round, you might need to trim your photos into circles.
- Measure and Trim Your Photos: Place your keychain blank on top of the photo. Use a pencil or pen to trace around the blank, marking the area you'll need to cut. Alternatively, measure the dimensions of the keychain blank with a ruler and then measure and cut your photos accordingly. Be precise! A slightly too-large photo won't fit, and a too-small photo might look odd.
- Prepare the Keychain Blank: If your keychain blank has a protective film, remove it. Clean the surface of the blank with a soft cloth to remove any dust or fingerprints.
- Apply the Adhesive: Carefully apply a thin, even layer of your chosen adhesive to the back of the photo. Avoid using too much adhesive, as this can cause bubbles or overflow.
- Attach the Photo to the Keychain Blank: Carefully center the photo on the keychain blank and press it firmly into place. Use your fingers or a soft cloth to smooth out any air bubbles, working from the center outwards.
- Seal the Photo (and Add Embellishments if desired): This is where you protect your photo and give it a finished look.
- Mod Podge: Apply a thin, even layer of Mod Podge over the entire surface of the photo and the keychain blank. Let it dry completely according to the product instructions (usually a few hours). You can apply multiple coats for added durability, allowing each coat to dry before applying the next.
- Epoxy Resin: Follow the manufacturer's instructions for mixing and applying the epoxy resin. This usually involves mixing the resin and hardener and then pouring it over the photo. Be sure to work in a well-ventilated area and wear gloves. Epoxy resin requires a curing period, so allow the keychain to dry undisturbed for the recommended time.
- Clear Glue: Apply a thin, even layer of clear glue over the photo. Let it dry completely. Multiple coats might be needed for a more durable finish.
- Let it Dry: Allow the adhesive to dry completely according to the product instructions. This is crucial for a durable and professional-looking finish.
- Attach the Keyring (if needed): If your keychain blank doesn't have a hole, use a hole punch to create one. Then, attach the keyring to the keychain blank.
- Admire Your Creation! You've now created a beautiful and personalized photo keychain! Enjoy carrying your cherished memories with you.
Tips and Tricks for Success
- Choose High-Quality Photos: The better the quality of your original photos, the better your keychain will look.
- Consider Scanning Your Photos: Before cutting into your precious originals, consider scanning them first. This preserves the original photos and allows you to experiment with different keychain designs.
- Practice Makes Perfect: If you're using epoxy resin, practice on a scrap piece of material first to get a feel for the process.
- Be Patient: Allow ample drying time for the adhesive to ensure a strong bond and a professional finish.
- Clean Up Spills Immediately: If you're using epoxy resin or other adhesives, clean up any spills or drips immediately to prevent them from hardening.
- Consider Digital Restoration: If your photos are faded or damaged, consider using photo editing software or a photo restoration service to enhance them before creating your keychain.
Beyond Keychains: Other DIY Photo Projects
Once you've mastered the photo keychain, you can explore other creative DIY projects to showcase your old photos. Here are a few ideas:
- Photo Coasters: Create personalized coasters using ceramic tiles and Mod Podge or epoxy resin.
- Photo Magnets: Turn your photos into magnets using magnetic sheets and adhesive.
- Photo Ornaments: Decorate your Christmas tree with personalized photo ornaments.
- Photo Puzzles: Turn your photos into custom puzzles using cardboard and adhesive.
- Photo Albums and Scrapbooks: Compile your photos into beautiful albums or scrapbooks.
And if you're looking for a quick and easy way to digitize your old photos before starting any of these projects, consider using the Photomyne app. Millions of users have scanned over half a billion images with Photomyne, making it a trusted and reliable tool for preserving your precious memories.
Creating a photo keychain is a rewarding and sentimental DIY project that allows you to carry your favorite memories with you wherever you go. With a little creativity and these simple steps, you can transform your old photos into a cherished keepsake that you'll treasure for years to come. So, gather your supplies, choose your favorite photos, and get crafting! Happy creating!